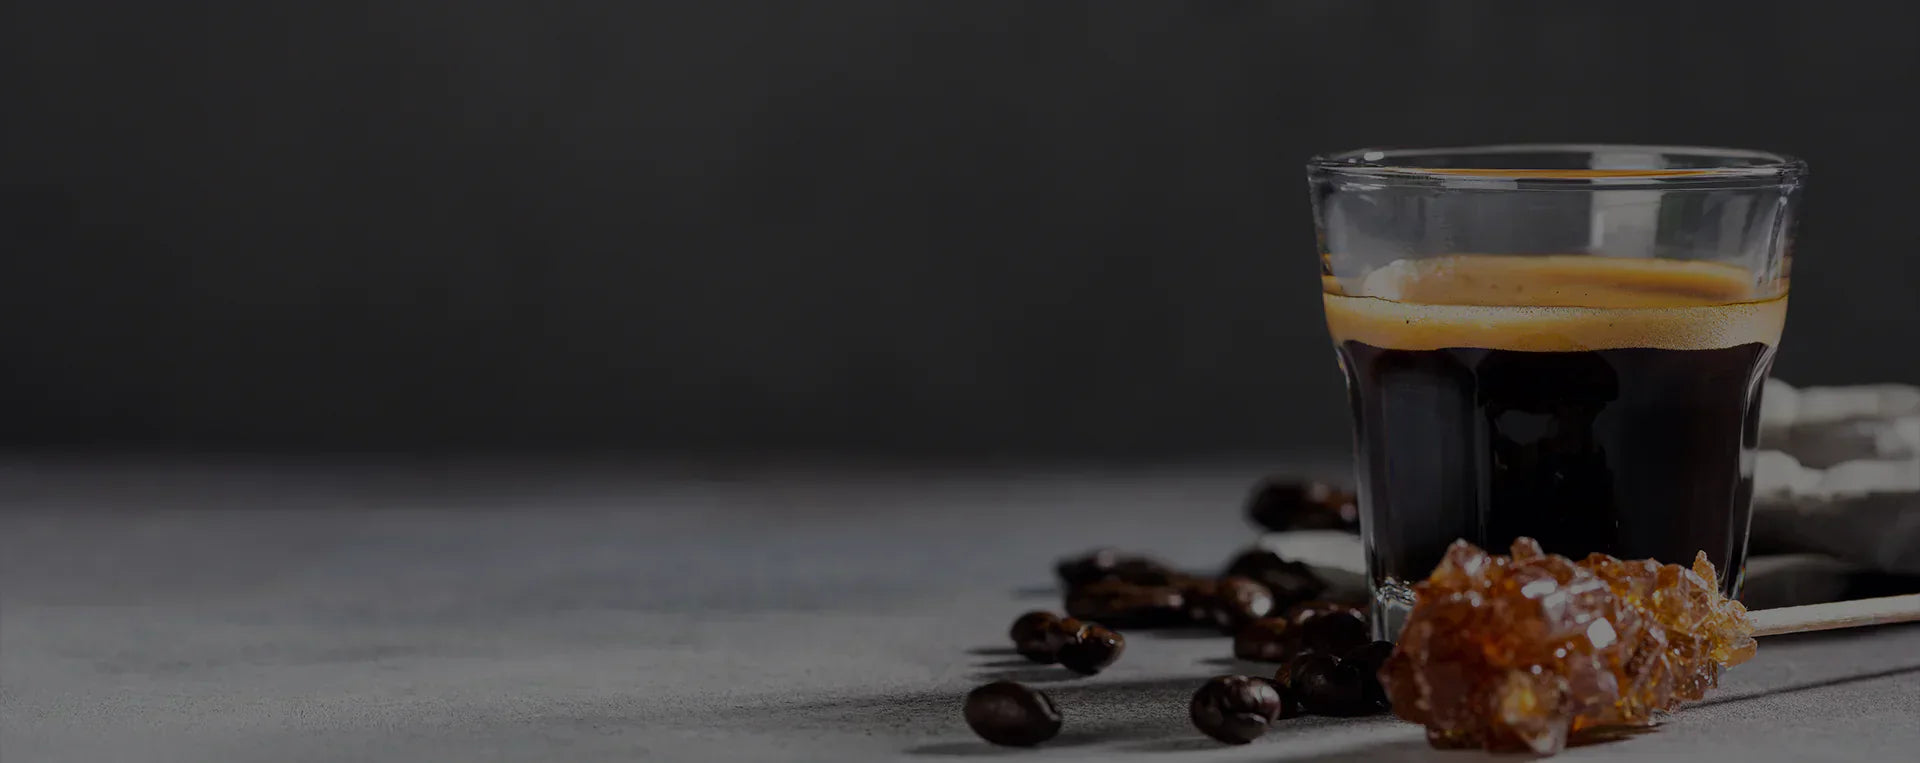
How to Make Espresso at Home
TL;DR: How to Make Espresso
To make espresso: Use an espresso machine that generates 9 bars of pressure. Grind 18g of fresh coffee to a fine consistency (like table salt). Distribute grounds evenly in the portafilter, tamp with 30 lbs of pressure, and lock into the machine. Extract for 25-30 seconds to yield 36g of liquid espresso (1:2 ratio). The result: concentrated coffee with thick golden crema, syrupy body, and intense flavor.
Equipment needed: Espresso machine ($300-2000+), quality burr grinder ($200-800), fresh whole bean coffee, scale, tamper.
Best coffee for espresso: Our dark roast Black Gold 6-bean blend delivers smooth, robust espresso with rich crema, while our light roast Thieves Gold offers vibrant, naturally sweet shots for those who prefer bright flavors.
The honest truth: Quality espresso requires investment ($500+ minimum for machine + grinder), but budget alternatives exist. If you commit, the results are worth it.
Learning how to make espresso at home feels intimidating. You're staring at expensive machines, conflicting advice online, and wondering if you'll ever pull a shot that rivals your favorite café.
Here's what we've learned after thousands of shots at 40 Thieves Coffee working alongside our roasting partners in Temecula, California: espresso is the most technical brewing method, but it's not magic. Understanding the four variables, dose, grind, time, and temperature, transforms home espresso from frustrating to rewarding.
This guide delivers honest answers about how to make espresso, what equipment you actually need, which coffee works best, and when budget alternatives make sense. We won't sugarcoat the investment required, but we'll show you the path to café-quality espresso in your kitchen.
What Espresso Actually Is (And Isn't)
Before we dive into how to make espresso, let's clear up the biggest misconception: espresso isn't just strong coffee.
Espresso is a specific brewing method that forces near-boiling water (195-205°F) through finely-ground coffee at approximately 9 bars of pressure. This high-pressure extraction produces a concentrated 1-2 ounce shot in 25-30 seconds, topped with golden-brown crema, the hallmark of properly pulled espresso.
The Science Behind Espresso
Pressure extraction fundamentally differs from immersion or drip brewing. At 9 bars (about 130 PSI), water penetrates the coffee puck and extracts soluble compounds that gravity-based methods miss. This creates espresso's signature syrupy body, concentrated flavor, and aromatic crema, emulsified oils, proteins, and carbon dioxide that form the golden layer on top.
When you learn how to make espresso correctly, you're not brewing stronger coffee. You're creating an entirely different beverage with unique characteristics:
- Concentration: Espresso delivers 30-50mg of caffeine per ounce compared to drip coffee's 12-16mg per ounce
- Body: Viscous, syrupy texture from emulsified oils (similar to French press coffee but more intense)
- Flavor: Amplified taste compounds, sweetness, bitterness, and acidity hit simultaneously
- Crema: Stable foam layer indicating proper extraction and fresh coffee
Understanding what espresso is helps you appreciate why making espresso at home requires specific equipment and technique. You can't replicate this extraction method with a regular coffee maker, French press, or pour-over setup.
The Equipment Reality: What You Actually Need
Here's the honest truth about how to make espresso at home: quality espresso requires real investment. We're not here to sell you fantasy, we're here to set realistic expectations.
The Minimum Investment for Real Espresso
To make espresso that actually tastes like espresso, you need two critical pieces of equipment:
- Espresso machine with minimum 9 bars pressure: $300-2000+
- Quality burr grinder with fine, consistent grind capability: $200-800
Yes, that's a $500-2800 minimum entry point. Before you close this tab, let's break down why this investment matters and explore alternatives if your budget doesn't stretch that far.
Why the Grinder Matters As Much As the Machine
Most beginners obsess over espresso machines while neglecting the grinder. This is backwards. Your grinder determines 70% of your espresso quality.
My Testing Reality: The Grinder Lesson
When we first started testing espresso methods for customer education, we paired a $900 semi-automatic machine with a $40 blade grinder. The results? Undrinkable. Bitter, sour, inconsistent shots with zero crema.
We switched to a Baratza Sette 270 ($400) with the same machine and same Black Gold coffee. Night and day difference. Suddenly we pulled balanced shots with thick crema and complex flavor notes, dark chocolate, brown sugar, subtle fruit undertones.
The lesson: invest equally in your grinder and machine. A $400 machine with a $400 grinder outperforms an $800 machine with a $50 grinder every single time.
When learning how to make espresso, your grinder needs stepless or near-stepless adjustment. Espresso requires grind sizes measured in microns, the difference between a perfect 30-second extraction and an unusable shot can be a single adjustment click.
Recommended Espresso Grinders
- Budget Entry ($200-300): Baratza Encore ESP, 1Zpresso JX-Pro (manual hand grinder)
- Serious Home Use ($400-600): Baratza Sette 270, Eureka Mignon Specialita, Rancilio Rocky
- Enthusiast Level ($800+): Eureka Mignon XL, Niche Zero, Ceado E37J
Espresso Machine Options By Budget
Budget Entry ($300-500)
Expect compromises at this price point, but you can make real espresso:
- Breville Bambino Plus ($350-400): Compact, automated milk frothing, decent pressure
- Gaggia Classic Pro ($450): Semi-automatic workhorse, upgradeable, strong user community
- Flair Signature Manual ($350): Completely manual lever espresso maker, zero electronics, requires practice
Serious Home Use ($600-1200)
This range delivers consistent, café-quality espresso:
- Breville Barista Express ($700): Built-in grinder (adequate but not exceptional), good for beginners
- Rancilio Silvia ($800): Commercial-grade components, temperature stable, durable
- Lelit Victoria ($900): PID temperature control, quiet operation, excellent build quality
Enthusiast Level ($1200+)
Professional-grade performance for serious home baristas:
- Profitec Go ($1400): Vibration pump, heat exchanger, simultaneous brewing and steaming
- Rocket Appartamento ($1700): Italian craftsmanship, heat exchanger, commercial aesthetics
- ECM Classika ($1800+): Rotary pump option, dual boiler systems available
Our Recommendation for Most People
If your budget allows $800-1000 total investment: Get the Gaggia Classic Pro ($450) + Baratza Sette 270 ($400). This combination teaches you proper espresso technique while delivering excellent results with our Thieves Gold or Black Gold espresso blends.
Budget Alternatives (Not True Espresso)
Can't swing $500+ right now? We understand. Here are espresso-style alternatives that won't produce real espresso but deliver concentrated coffee:
- Moka Pot ($30-80): Stovetop brewer producing strong, concentrated coffee at 1-2 bars pressure (not the 9 bars needed for true espresso). Works with finely ground coffee and creates a bold brew, but no crema.
- AeroPress ($40): Versatile manual brewer creating concentrated coffee through pressure. Not espresso, but produces a rich, full-bodied cup suitable for Americanos or lattes when you use a fine grind.
- Nespresso/Pod Machines ($150-400): Convenient and consistent, but limited to pre-ground pods. You sacrifice coffee quality and freshness for convenience. Not comparable to fresh-ground espresso.
These alternatives answer "how to make espresso at home without a machine" with a caveat: you're not making espresso. You're making concentrated coffee. For true espresso, you need true espresso equipment.
Best Coffee for Espresso: Blend vs Single-Origin
Once you've invested in equipment, choosing the right coffee determines whether you love or hate learning how to make espresso.
Why Blends Dominate Espresso
Ask any professional barista or roaster what coffee works best for espresso, and most will point you toward blends. Here's why:
The Blend Advantage for Espresso
Espresso magnifies everything, flavor, acidity, bitterness, sweetness. Single-origin coffees often deliver one dominant characteristic (bright acidity, fruit-forward sweetness, etc.). Under espresso's intense extraction, that single characteristic can become overwhelming.
Blends combine beans with complementary flavors, creating balance. A blend might pair Brazilian nuts and chocolate with Ethiopian fruit notes and Guatemalan caramel sweetness. The result: complex, harmonious espresso instead of one-note intensity.
Our roasting partners in Temecula, California specifically craft espresso blends to handle pressure extraction. They select beans based on how flavors interact at 9 bars pressure, not how they taste in a French press or pour-over.
40 Thieves Coffee Espresso Recommendations
Black Gold: Our Flagship Espresso Blend
Roast Level: Dark | Flavor Profile: Smooth, robust, rich body
Black Gold is our signature 6-bean blend crafted for espresso's pressure extraction. This dark roast delivers smooth, robust flavor with a full body that holds up beautifully in every cup. Expect thick crema, syrupy texture, and bold depth without harsh bitterness.
Best for: Traditional espresso shots, cappuccinos, lattes. This is the coffee to learn how to make espresso with, forgiving during dialing in, consistently delicious once dialed.
Thieves Gold: Vibrant Light Roast Espresso
Roast Level: Light/Blonde | Flavor Profile: Natural sweetness, vibrant flavors, bright complexity
Thieves Gold takes a different approach to espresso with Central American and African beans roasted light to preserve natural sweetness and vibrant character. Under espresso's pressure extraction, this blend delivers bright complexity, floral and fruit-forward notes with a clean, sweet finish that showcases the beans' origin characteristics.
Best for: Straight espresso shots, anyone who enjoys third-wave specialty coffee with bright, nuanced flavors. A great option for experienced home baristas looking to explore lighter espresso profiles.
Espresso Grind: Whole Bean vs Pre-Ground
When you learn how to make espresso, this decision dramatically impacts your results: whole bean ground fresh or pre-ground espresso grind?
The honest answer: whole bean ground immediately before brewing wins every time. Here's why:
- Oxidation: Ground coffee exposes 1000x more surface area to oxygen. Flavor compounds degrade within 30 minutes. Pre-ground espresso loses complexity and aromatics within days.
- CO₂ retention: Freshly ground coffee retains carbon dioxide essential for crema formation. Pre-ground espresso produces thin, unstable crema.
- Customization: Dialing in espresso requires micro-adjustments to grind size. Pre-ground offers zero flexibility.
My Testing: Fresh Ground vs Pre-Ground Espresso
We ran a direct comparison using Black Gold from the same roast batch. Group 1: whole bean ground fresh each morning. Group 2: ground once, stored in airtight container, used over one week.
Day 1: Minimal difference, both groups produced thick crema, balanced flavor.
Day 3: Pre-ground shots showed noticeably thinner crema, muted aroma.
Day 7: Pre-ground espresso tasted flat, one-dimensional. The complex brown sugar and chocolate notes disappeared, replaced by generic "coffee" flavor. Fresh-ground shots maintained vibrant character.
Conclusion: If you're serious about how to make espresso, grind fresh daily. If you must buy pre-ground (budget constraints, no grinder yet), use it within 3-5 days maximum and store it in an airtight container in a cool, dark place.
Single-Origin Espresso: When It Works
We recommend blends for most people learning how to make espresso, but single-origin espresso has its place:
- Experienced home baristas: Once you've mastered dialing in, single-origins offer unique flavor experiences
- Light roast lovers: Modern "third wave" espresso emphasizes bright, fruit-forward single-origins from Ethiopia, Kenya, Colombia
- Exploration: Single-origins let you taste how different regions, processing methods, and varietals express themselves under pressure
If you want to experiment with single-origin espresso, our El Bandido Colombian offers approachable sweetness and balanced acidity that handles espresso extraction well.
The Four Variables: How to Actually Make Espresso
Now we get to the technical core of how to make espresso. Every shot you pull balances four interdependent variables: dose, grind, time, and temperature.
Change one variable, and you must adjust others to compensate. This relationship, called "dialing in", separates good espresso from mediocre shots.
Variable 1: Dose (How Much Coffee)
Dose refers to the amount of ground coffee in your portafilter basket. Standard doses range from 16-22 grams depending on basket size and desired output.
Common ratios for how to make espresso:
- Traditional (1:2 ratio): 18g coffee → 36g liquid output in 25-30 seconds
- Ristretto (1:1.5 ratio): 18g coffee → 27g liquid output in 20-25 seconds (concentrated, sweet)
- Lungo (1:3 ratio): 18g coffee → 54g liquid output in 30-40 seconds (longer, more diluted)
Why Dose Matters
Too little coffee: Water channels through weak spots, creating sour, under-extracted espresso.
Too much coffee: Water can't penetrate evenly, producing bitter over-extraction around edges and sour under-extraction in the center.
Consistent dosing (within 0.5g) ensures repeatable results. This is why a scale is non-negotiable when learning how to make espresso.
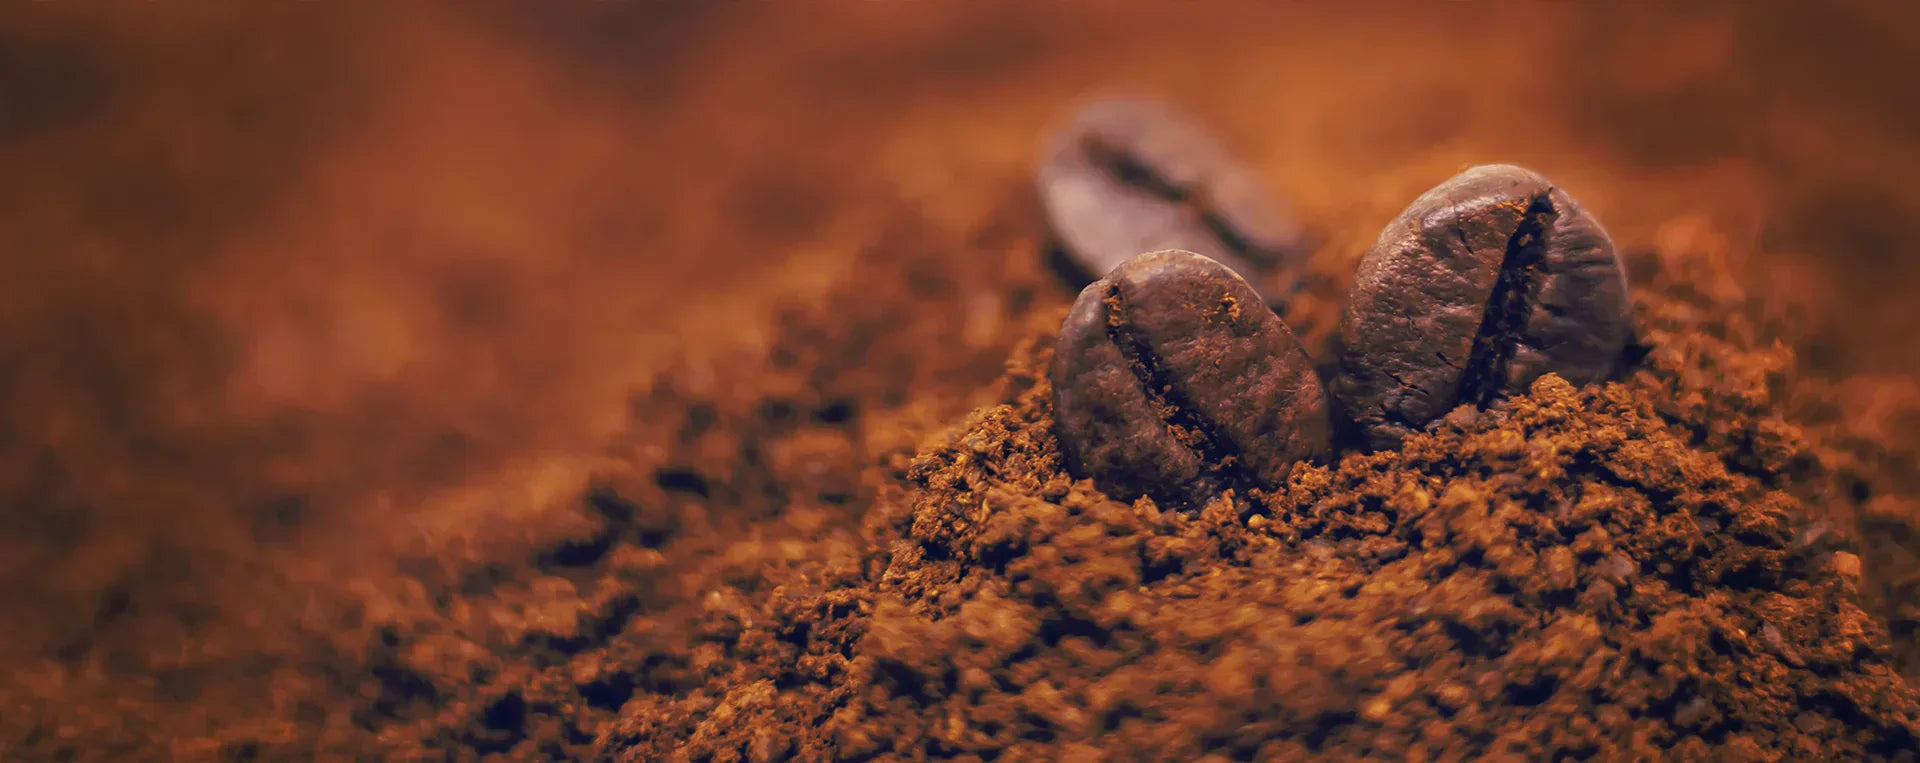
Variable 2: Grind Size (Particle Consistency)
Grind size controls extraction rate more than any other variable. Finer grinds increase surface area and slow water flow. Coarser grinds decrease resistance and speed extraction.
Espresso requires the finest grind of any brewing method, similar to table salt or slightly finer. The grind must be extremely consistent (uniform particle size) to prevent channeling.
My Grind Size Dialing Story
When we first tested Thieves Gold for espresso recommendations, our initial grind setting produced shots that pulled in 15 seconds, way too fast. The espresso tasted sour, watery, with thin crema.
We adjusted the grinder two clicks finer. Shot time increased to 22 seconds, better, but still under-extracted with sharp acidity.
Another click finer: 28-second extraction, thick golden crema, balanced flavor. The natural sweetness and vibrant fruit notes emerged clearly.
One more click finer out of curiosity: 40-second extraction, bitter and astringent. We backed off to the 28-second setting.
Total range from undrinkable to perfect: three grinder clicks. That's how precise espresso grinding needs to be. You're working in microns, adjusting until you hit the sweet spot where your specific coffee, machine, and technique align.
Signs your grind needs adjustment when learning how to make espresso:
- Too coarse: Shots pull in under 20 seconds, taste sour/acidic, thin crema, watery body
- Too fine: Shots pull in over 35 seconds, taste bitter/harsh, extraction chokes or sputters
- Inconsistent grind: Channeling (water finds weak spots), uneven extraction, alternating sour and bitter notes
Variable 3: Time (Extraction Duration)
Extraction time, the duration from when you engage the pump to when you stop the shot, typically targets 25-30 seconds for a standard espresso.
During extraction, water dissolves different compounds at different rates:
- 0-10 seconds: Acids extract (brightness, fruit notes)
- 10-20 seconds: Sugars and lipids extract (sweetness, body)
- 20-30 seconds: Complex flavors and caramelized compounds extract (chocolate, nuts)
- 30+ seconds: Bitter compounds extract (ashy, charred notes)
The Extraction Sweet Spot
This is why 25-30 seconds works for most espresso: you extract enough acids for brightness, sufficient sugars for balance, complex flavors for depth, but stop before bitterness dominates.
However, different coffees extract at different rates. Our Black Gold dark roast might taste best at 28 seconds, while a lighter roast like Thieves Gold might need 32 seconds to fully develop sweetness.
Variable 4: Temperature (Water Heat)
Brew temperature affects extraction efficiency and flavor development. Most espresso machines target 195-205°F (90-96°C).
Temperature impacts when you learn how to make espresso:
- 195-198°F: Lower extraction, preserves delicate flavors, emphasizes acidity, best for light roasts like our Thieves Gold
- 200-203°F: Balanced extraction, standard for medium roasts, a good middle ground for most blends
- 204-205°F: Higher extraction, pulls more body and bittersweet notes, works for dark roasts like our Black Gold
My Temperature Testing Revelation
Most entry-level espresso machines lack precise temperature control, but our testing setup included a PID-controlled machine. We pulled identical shots of Black Gold at different temperatures: 195°F, 200°F, 205°F.
195°F: Bright, almost tea-like espresso. The chocolate notes were muted, acidity dominated. Interesting but unbalanced.
200°F: Everything clicked. Rich chocolate, brown sugar sweetness, subtle cherry finish. This became our recommended temperature.
205°F: Heavier body, more bittersweet. The chocolate shifted toward dark cocoa, caramel became molasses-like. Some people preferred this intensity.
Lesson learned: Temperature adjustments fine-tune flavor profile. If your machine allows PID programming, experiment in 2°F increments to find your preference.
Step-by-Step: How to Make Espresso at Home
You've got equipment. You've chosen your coffee. Now let's walk through the actual process of how to make espresso shot by shot.
Preparation: Before Your First Shot
- Heat your machine: Turn on your espresso machine 15-20 minutes before brewing. Thermal stability matters, cold groupheads produce inconsistent extraction.
- Purge the grouphead: Run water through the grouphead (without portafilter) for 3-5 seconds to flush residual grounds and heat the brewing surface.
- Warm your cup: Place your cup on the machine's cup warmer or rinse with hot water. Cold cups shock the espresso and kill crema.
The Espresso Process
Step 1: Dose Your Coffee (18-20g)
Place your portafilter on a scale, tare to zero, and grind 18-20 grams of coffee directly into the basket. We recommend starting with 18g when learning how to make espresso, it's the most forgiving dose.
Use fresh whole bean coffee ground immediately before brewing. We use Black Gold for these instructions.
Step 2: Distribute Grounds Evenly
Distribution prevents channeling. Use one of these methods:
- WDT (Weiss Distribution Technique): Use a thin needle or specialized tool to stir grounds, breaking clumps
- Tap and shake: Gently tap the portafilter sides, rotate, tap again to settle grounds evenly
- Distribution tool: Specialized leveling tool that evens the coffee bed before tamping
Step 3: Tamp with Consistent Pressure
Place the portafilter on a flat surface. Apply downward pressure with the tamper until grounds compress into a level puck. Aim for 30 pounds of pressure (firm but not excessive).
The goal: create a level, evenly compressed puck that forces water to flow uniformly through all coffee grounds. Uneven tamping = channeling = bad espresso.
Step 4: Lock and Pull Your Shot
- Wipe any loose grounds from the portafilter rim
- Lock the portafilter into the grouphead
- Place your warmed cup under the spout
- Start your timer and immediately engage the pump
Watch the extraction:
- 0-5 seconds: Espresso should start dripping (if nothing happens, grind is too fine)
- 5-10 seconds: Flow becomes a steady stream, dark and syrupy
- 10-25 seconds: Espresso lightens to golden-brown, crema forms
- 25-30 seconds: Stop extraction when you reach target volume (36g for 1:2 ratio)
Step 5: Evaluate and Adjust
Look at your espresso before tasting:
- Crema: Should be golden-brown, thick (3-5mm), stable for 30+ seconds
- Color: Rich reddish-brown, not pale or black
- Volume: 1-2 ounces from 18g dose (1:2 ratio)
Taste your espresso:
- Balanced: Sweet, slightly acidic, pleasant bitterness, full body → Perfect! You've dialed in.
- Sour/sharp: Under-extracted → Grind finer or increase temperature
- Bitter/harsh: Over-extracted → Grind coarser or decrease temperature
- Weak/watery: Channeling or too coarse → Check distribution and grind finer
Dialing In Takes Practice
Your first ten shots will probably taste mediocre. This is normal. Learning how to make espresso means developing sensory memory, understanding what balanced extraction tastes like versus sour under-extraction or bitter over-extraction.
Pull shots back-to-back, adjusting one variable at a time. Document your settings: grind size, dose, time, temperature, taste notes. Within 15-20 shots, you'll find the sweet spot for your specific coffee and equipment.
Common Mistakes (And How to Fix Them)
After watching countless people learn how to make espresso, we've identified the mistakes that sabotage results:
Mistake 1: Using Stale Coffee
The problem: Coffee older than 3-4 weeks produces thin crema, flat flavor, inconsistent extraction.
The fix: Buy fresh-roasted coffee from specialty roasters like 40 Thieves Coffee. Check roast dates. Use beans within 2-4 weeks of roasting. Store in an airtight container away from light, heat, and moisture. Never freeze or refrigerate whole beans.
Mistake 2: Inconsistent Dosing
The problem: Eyeballing dose creates shot-to-shot variation. 17.5g versus 18.5g dramatically affects extraction.
The fix: Use a scale. Weigh every dose. Consistency is foundational when learning how to make espresso. A $20 scale transforms your results more than a $200 machine upgrade.
Mistake 3: Skipping Distribution
The problem: Grounds settle unevenly in the portafilter. Clumps create dense spots, gaps create weak spots. Water finds the path of least resistance, channeling through weak areas and leaving dry pockets of coffee.
The fix: Always distribute grounds before tamping. WDT (Weiss Distribution Technique) with a needle-style tool breaks up clumps. Takes 5 seconds, prevents 90% of channeling issues.
Mistake 4: Adjusting Multiple Variables
The problem: Shot tastes bad, so you grind finer AND increase dose AND change temperature. Now you don't know what fixed (or broke) the extraction.
The fix: Change one variable at a time. Grind size usually needs adjustment first. If adjusting grind doesn't solve the problem after 3-4 shots, then modify dose or temperature.
Mistake 5: Giving Up Too Early
The problem: First five shots taste terrible. User assumes equipment is broken or they lack talent.
The fix: Espresso is the most technical brewing method. Expect a learning curve. Professional baristas pull hundreds of shots to master their machines. Give yourself 20-30 shots minimum before judging your setup or abilities. Document each shot's parameters to identify patterns.
Customer Success Story: From Frustration to Morning Ritual
A customer emailed us after buying Black Gold specifically for espresso. She'd purchased a Gaggia Classic Pro but couldn't pull a drinkable shot after two weeks. Every extraction tasted sour or bitter, crema was non-existent, and she was ready to sell the machine.
We asked her to document one shot attempt: grind setting, dose, extraction time, taste notes. She sent photos showing:
- Grind looked coarse (almost medium grind territory)
- Dose was inconsistent (16-21g range)
- Extraction time: 12 seconds (!)
We recommended: grind 4 clicks finer, consistent 18g dose, aim for 28-second extraction. She sent a video two days later, thick crema, balanced extraction, huge smile. Six months later, she's pulling two shots every morning and has upgraded to a Sette 270 grinder.
The lesson: Most "bad equipment" or "bad coffee" problems are actually technique and dialing-in issues. Persist through the learning curve.
When to Skip Home Espresso (Honest Advice)
We sell coffee. We want you to brew at home. But we also care about setting realistic expectations. Here's when learning how to make espresso at home might not make sense:
Skip Home Espresso If:
- You primarily drink milk-based drinks and value convenience: Café lattes are cheap relative to equipment investment. A $5 daily latte costs $1,825/year. An espresso setup costs $500-1000 upfront but requires time, practice, and maintenance. Break-even takes 6-12 months if you're drinking 1-2 lattes daily.
- You don't have counter space: Espresso machines, grinders, and accessories require dedicated space. If you're tight on kitchen real estate, consider other brewing methods like our French press guide or pour-over tutorials.
- You're not willing to practice: Espresso demands repetition. If you want excellent coffee without technique learning curves, cold brew concentrate or automatic drip with quality beans delivers better results for less effort.
- Budget is under $400 total: You need minimum $500 for machine + grinder that produces real espresso. If your budget is tighter, invest that money in a quality hand grinder ($100-200) and explore AeroPress, Moka pot, or pour-over methods. These deliver excellent coffee without espresso's entry cost.
Home Espresso Makes Sense If:
- You drink 2+ espresso drinks daily: Economics favor home brewing. Plus you control quality, café espresso varies wildly.
- You enjoy the craft: If you geek out on technique, equipment, and mastering skills, espresso offers endless depth.
- You value freshness: Most cafés don't disclose roast dates. Home espresso lets you brew coffee 5-14 days off roast, peak freshness window.
- You have realistic expectations: Your first month will produce mediocre shots. Accept the learning curve and you'll develop a valuable skill.
Alternatives to Traditional Espresso Machines
If you're not ready to invest $500+ in how to make espresso with traditional equipment but want concentrated coffee, these alternatives deliver:
Moka Pot: Espresso's Stovetop Cousin
Price: $30-80 | Pressure: 1-2 bars (vs espresso's 9 bars)
Moka pots produce strong, concentrated coffee with rich body but no crema. The brewing process is simple: water boils in the bottom chamber, steam pressure forces it through coffee grounds into the top chamber.
Best for: Making Americanos (dilute with hot water), moka pot "lattes" (add steamed milk), or drinking straight if you enjoy intense coffee. Use fine grind coffee, slightly coarser than espresso but finer than drip.
Limitations: No crema, can produce bitter brew if left on heat too long, doesn't create true espresso pressure.
AeroPress: Versatile Concentrated Coffee
Price: $40 | Pressure: Manual pressure (1-2 bars)
The AeroPress creates concentrated coffee through manual pressure. Use 15-18g coffee with 50-60g water, inverted method, and firm press for "espresso-style" concentration.
Best for: Travel, office brewing, versatility (also makes regular coffee, cold brew). Portable, nearly indestructible, easy cleanup.
Limitations: Not espresso, can't steam milk, requires manual effort per cup.
Pod Machines: Convenience Over Quality
Price: $150-400 | Pressure: Varies (some reach 9 bars)
Nespresso and similar pod systems deliver consistency and convenience. Insert pod, press button, receive espresso-like drink in 30 seconds.
Best for: People who value convenience over coffee quality, offices, those who won't maintain traditional equipment.
Limitations: Pre-ground coffee (stale within weeks of packaging), limited selection, ongoing pod costs ($0.70-1.50 per pod), environmental waste, can't use specialty beans like our Black Gold or Thieves Gold.
Frequently Asked Questions: How to Make Espresso
Can you make espresso with regular coffee?
Yes, you can make espresso with any coffee bean, but espresso blends perform better. Regular coffee often means beans roasted for drip brewing, lighter roasts with flavor profiles that become overly acidic under espresso's pressure extraction. Espresso blends like Black Gold are specifically roasted to balance sweetness, body, and acidity at 9 bars pressure. That said, you can absolutely pull espresso shots from any whole bean coffee; results will vary based on roast level and origin characteristics.
How to make espresso at home without a machine?
You cannot make true espresso without a machine that generates 9 bars of pressure. However, you can make concentrated, espresso-style coffee using a Moka pot ($30-80) or AeroPress ($40). Moka pots produce strong coffee at 1-2 bars pressure, no crema, but similar intensity. AeroPress creates concentrated coffee through manual pressure. Both methods work with fine grind coffee and deliver rich, full-bodied results suitable for Americanos or milk drinks, though they won't replicate true espresso's characteristics.
What is the easiest way to make espresso at home?
The easiest way to make espresso at home is using a super-automatic espresso machine ($600-2000+) or pod system like Nespresso ($150-400). Super-automatics grind, dose, tamp, and extract automatically, you press one button. However, "easiest" trades convenience for quality and control. For real espresso with minimal learning curve while maintaining quality, we recommend a semi-automatic machine like the Breville Bambino Plus ($350) paired with pre-ground espresso from fresh-roasted beans. You'll sacrifice some freshness versus whole bean grinding but gain simplicity while learning how to make espresso.
Is it okay to use ground coffee for espresso?
Pre-ground coffee works for espresso but delivers inferior results compared to grinding fresh whole beans immediately before brewing. Ground coffee oxidizes rapidly, flavor compounds degrade within 30 minutes of grinding, and crema-producing CO₂ escapes within days. If you must use pre-ground espresso, buy it in small quantities (8-12oz maximum), store in an airtight container in a cool, dark place, and use within 5-7 days of grinding. However, investing in a quality burr grinder ($200-400) transforms your espresso quality more dramatically than upgrading your espresso machine. Fresh-ground Black Gold whole beans produce thick crema and complex flavor that pre-ground coffee cannot match.
Can I make espresso with a regular coffee maker?
No, regular coffee makers cannot make espresso. Espresso requires 9 bars of pressure forcing water through finely-ground coffee in 25-30 seconds. Drip coffee makers use gravity to pull water through grounds, zero pressure, completely different extraction. The result is regular coffee, not espresso, regardless of how dark you roast the beans or how fine you grind them. If you want espresso-like concentration from a drip machine, you can use double the normal coffee dose with half the water, but this produces strong coffee, not espresso. For actual espresso, you need dedicated espresso equipment.
What is the 2:1 rule for espresso?
The 2:1 rule for espresso refers to the brew ratio: 1 gram of ground coffee produces 2 grams of liquid espresso. For example, 18g of coffee yields 36g of espresso (approximately 1.5 fluid ounces) in 25-30 seconds. This ratio creates balanced extraction, enough water to dissolve desirable flavor compounds without over-extracting bitter elements. You can adjust this ratio for preference: 1.5:1 for concentrated ristretto shots, or 3:1 for longer lungo extractions. When learning how to make espresso, start with 2:1 ratio as your baseline, then experiment once you've dialed in grind size and timing.
Is espresso just strong coffee?
No, espresso is not just strong coffee, it's a completely different brewing method that produces a unique beverage. Espresso uses 9 bars of pressure to force near-boiling water through finely-ground coffee in 25-30 seconds, creating concentrated liquid with syrupy body, intense flavor, and crema (golden foam layer). Strong coffee is simply regular coffee brewed with more grounds or less water, same gravity-based extraction, just more concentrated. The pressure in espresso extracts different compounds than drip or immersion methods, producing distinct flavor characteristics, body, and mouthfeel that cannot be replicated by making "stronger" regular coffee. They are fundamentally different drinks.
Is espresso healthier than coffee?
Espresso and regular coffee offer similar health benefits, both contain antioxidants, caffeine, and beneficial compounds. Espresso is more concentrated per ounce (30-50mg caffeine per ounce vs 12-16mg in drip coffee) but typically consumed in smaller quantities. One espresso shot (1-2 oz) contains 60-100mg caffeine compared to 95-200mg in an 8oz cup of drip coffee. Espresso's high-pressure extraction may preserve slightly more antioxidants, while paper-filtered drip coffee removes more cafestol (a compound that can raise cholesterol). Neither is inherently "healthier", both offer cardiovascular and cognitive benefits when consumed in moderation. Your total daily caffeine intake matters more than brewing method.
Can you make an espresso shot with a regular coffee maker?
No, you cannot make an espresso shot with a regular coffee maker. Regular coffee makers lack the pressure system required for espresso extraction. Espresso demands 9 bars of pressure (approximately 130 PSI) forcing water through finely-ground coffee in 25-30 seconds. Drip coffee makers use gravity, zero pressure, pulling water through grounds over 4-6 minutes. Even if you use fine grind coffee and dark roast beans in a drip machine, you'll produce strong coffee, not espresso. For actual espresso shots, you need an espresso machine, Moka pot (produces concentrated coffee at 1-2 bars), or manual lever device that generates sufficient pressure.
Is 2 shots of espresso the same as a cup of coffee?
Two shots of espresso (2-3 oz total) contain roughly the same caffeine as a standard 8oz cup of coffee, both deliver approximately 120-180mg caffeine. However, they are not the same beverage. Espresso is concentrated with intense flavor, syrupy body, and thick crema, consumed in small quantities. Regular coffee is diluted with milder flavor, thinner body, consumed in larger volumes. Two espresso shots provide the caffeine kick of a coffee cup but deliver completely different taste, texture, and drinking experience. Many people enjoy espresso's intensity in small doses while others prefer coffee's mellow, sustained drinking experience. Both are coffee, but they serve different purposes and preferences.
Conclusion: Your Path to Home Espresso Mastery
Learning how to make espresso at home demands investment, financial and temporal. You'll spend $500-1000 on equipment, pull dozens of mediocre shots while dialing in, and question whether café espresso was easier.
But once you dial in your first perfect shot, thick golden crema cascading into your cup, complex aromatics filling your kitchen, that first sip delivering perfectly balanced sweetness, body, and just-right bitterness, you'll understand why espresso enthusiasts obsess over this brewing method.
Home espresso gives you complete control: freshness (beans 5-14 days off roast), customization (dial in YOUR perfect shot), and economics (break even within 6-12 months if you drink espresso daily). You're not just making coffee; you're developing a valuable skill and morning ritual.
Start with quality equipment (don't skimp on the grinder), fresh whole bean espresso blends like our Black Gold or Thieves Gold, and realistic expectations. Document your shots, adjust one variable at a time, and persist through the learning curve.
Within 20-30 shots, you'll dial in your setup. Within 3-6 months, you'll pull café-quality espresso effortlessly. And within a year, you'll wonder how you ever tolerated subpar coffee from chains serving beans roasted months ago.
Welcome to the craft of espresso. Your journey starts with the next shot you pull.
Sources and References
- Illy, A., & Viani, R. (2005). Espresso Coffee: The Science of Quality (2nd ed.). Academic Press. DOI: 10.1016/B978-0-12-370371-2.X5000-2
- Specialty Coffee Association. (2024). "Brewing Best Practices: Espresso." SCA Standards & Resources. https://sca.coffee/research/brewing-best-practices
- Petracco, M. (2001). Technology IV: Beverage Preparation: Brewing Trends for the New Millennium. In Coffee: Recent Developments (pp. 140-164). Blackwell Science. DOI: 10.1002/9780470690499.ch7
- Sanchez-Lopez, J. A., et al. (2014). Coffee extraction: A review of parameters and their influence on the physicochemical characteristics and flavour of coffee brews. Trends in Food Science & Technology, 96, 45-60. DOI: 10.1016/j.tifs.2019.12.004
- National Coffee Association USA. (2024). "How to Brew Coffee: Espresso." NCA Brewing Guide. https://www.ncausa.org/About-Coffee/How-to-Brew-Coffee
- Belitz, H. D., Grosch, W., & Schieberle, P. (2009). Food Chemistry (4th ed.). Springer-Verlag. DOI: 10.1007/978-3-540-69934-7
- Cordoba, N., et al. (2020). Coffee extraction: A review of parameters and their influence on the physicochemical characteristics. Comprehensive Reviews in Food Science and Food Safety, 19(4), 2201-2224. DOI: 10.1111/1541-4337.12590
- Cappuccio, F. P., et al. (2018). Coffee consumption and mortality from cardiovascular diseases and total mortality. European Journal of Epidemiology, 33(9), 859-869. DOI: 10.1007/s10654-018-0425-9
- Poole, R., et al. (2017). Coffee consumption and health: umbrella review of meta-analyses. BMJ, 359, j5024. DOI: 10.1136/bmj.j5024
- Gloess, A. N., et al. (2013). Comparison of nine common coffee extraction methods: instrumental and sensory analysis. European Food Research and Technology, 236(4), 607-627. DOI: 10.1007/s00217-013-1917-x
- Folmer, B. (Ed.). (2017). The Craft and Science of Coffee. Academic Press. DOI: 10.1016/C2014-0-03720-7
- Coffee Quality Institute. (2024). "Q Coffee System: Cupping Protocols & Standards." CQI Resources. https://www.coffeeinstitute.org/
- Angeloni, S., et al. (2019). What kind of coffee do you drink? An investigation on effects of eight different extraction methods. Food Research International, 116, 1327-1335. DOI: 10.1016/j.foodres.2018.10.022
- Caporaso, N., et al. (2018). Variability of single bean coffee volatile compounds of Arabica and robusta roasted coffees analysed by SPME-GC-MS. Food Research International, 108, 628-640. DOI: 10.1016/j.foodres.2018.03.077
- U.S. Food and Drug Administration. (2024). "Spilling the Beans: How Much Caffeine is Too Much?" FDA Consumer Updates. https://www.fda.gov/consumers/consumer-updates/spilling-beans-how-much-caffeine-too-much
- World Coffee Research. (2024). "Arabica Coffee Varieties." WCR Variety Catalog. https://varieties.worldcoffeeresearch.org/
Disclaimer
Health Information: This article provides general information about coffee and caffeine consumption. Individual responses to caffeine vary. Consult your healthcare provider before making significant changes to your caffeine intake, especially if you are pregnant, nursing, have heart conditions, anxiety disorders, or take medications that interact with caffeine.
Equipment Safety: Espresso machines operate at high temperatures and pressure. Always follow manufacturer safety instructions. Allow machines to cool before cleaning or maintenance. Keep equipment away from water sources to prevent electrical hazards. Supervise children around espresso equipment.
Product Recommendations: Equipment recommendations are based on our testing experience and industry standards. We are not affiliated with mentioned equipment brands and receive no compensation for recommendations. Your results may vary based on individual equipment, technique, and coffee selection.
作者:Gabe Hollins

发表评论
此站点受 hCaptcha 保护,并且 hCaptcha 隐私政策和服务条款适用。